Best Bike Lights
Whether you’re a dedicated night rider, commuter, or occasional cyclist, having reliable bike lights isn’t just about following the law—it’s about staying alive on the road. As cycling continues to grow in popularity, the market has been flooded with options ranging from budget-friendly basics to high-tech powerhouses, making it increasingly challenging to choose the right lighting setup for your needs. In this guide, we’ll cut through the confusion and shine a light on the best bike lights available today, helping you understand what features really matter, how many lumens you actually need, and which options offer the best value for your riding style. Whether you’re prioritizing visibility in urban environments or seeking powerful illumination for trail riding, our comprehensive review will help you make an informed decision to keep you safe and visible on every journey.
Contents
- Top 5 Bike Lights:
- 1. Knog Blinder 900 front bike light – Best Bike Light Overall
- 2. LezyneMacrodrive 1300XXL – Best Bike Light for Commuting
- 3. Garmin Varia RTL515 – Best Rear Bike Light
- 4. NITERIDER LUMINA OLED 1200 BOOST – Best Bike Light for Best Battery Life
- 5. NiteRider Lumina Micro 900 – Best Budget Bike Light
- Things To Consider When Buying a Bike Light:
- Types of Bike Lights
- Front Lights
- Rear Lights
- Combination Lights
- Factors to Consider When Buying a Bike Light
- Brightness Levels
- Battery Life
- Mounting Options
- Tips for Choosing the Right Bike Light
- Terrain Considerations
- Usage Scenarios
- Legal Requirements
- Step-by-Step Guide to Installing Bike Lights
- Tools Needed
- Installation Process
- Pros and Cons of Different Bike Lights
- LED Lights
- Rechargeable vs. Disposable
- Maintenance and Care for Bike Lights
- Cleaning
- Battery Replacement
- To wrap up
Top 5 Bike Lights:
1. Knog Blinder 900 front bike light – Best Bike Light Overall

Knog Blinder 900 We have our go to bike light, and that is the Knog Blinder 900, best for commuters and casual cyclists. After plenty of testing, it is easy to see why this product out-performs the rest of its class.
One of the significant benefits is its simple mounting mechanism. A strong silicone band makes it easy to change between bikes so you spend less time fiddling with the tachometer. A quick-release mechanism also enables you to unlatch it easily when securing in town, enhancing both safety and simplicity.
On full brightness we were impressed by two hours of battery life. It can be easily rejuvenated thanks to USB-C charging, but is future-proof in terms of revamping and replacing it. A quick charge returns you to the road, so you keep your eye on the ride, not the battery.
While lumens output is ideal for endurance rides, it may not be enough for fast-paced jaunts on dark nights. This aspect is conducive to relaxed commutes as well as post-work training sessions. Street lights make this brightness sufficient, and so a reasonable choice for those who like casual biking.
What stands out? The ease of use and mounting process. It is not the brightest light set around, but where other lights go for TRUMP card, Knog Blinder goes for a blend of performance and practicality.
A simple battery indicator is green most of the time but turns red as power runs low. It’s simple but could use a little more information.
This is considered a light for your cycling needs. Let your next adventure take you away with the experience Knog Blinder 900 brings!
2. LezyneMacrodrive 1300XXL – Best Bike Light for Commuting

Make your ride more visible with the Lezyne Macro Drive 1300XXL. If you’re in the market for a bike light, this is it — the only commuter bike light you’ll ever need. It pumps out a whopping 1300 lumens and features seven settings for the changing terrain. It has a super low “femto mode,” with the most incredible 300-hour run time on its lowest setting. You won’t have to worry about it dying on your way home.
An impressive machined aluminum body exemplifies quality construction. It deals with the elements like a pro, IPX7 waterproofing means your light will survive getting soaked on a rainy ride. What’s more, the silicone button illuminates so you can take a quick glance at your battery status to always be up to date on your charge.
I was particularly impressed with a feature called its pulse mode. This context draws in attention, helping to make you more visible to both motorists and passersby. It means you’ll get noticed, even in the gloomier hours. The beam pattern is also quite commendable; there will be no spots which you cannot see during sharp turns on the road.
The mounting setup could use some slight improvement, however. While the heavy-duty rubber strap holds well once in place, it takes a strong hand to get it in there. Though it stays put even on the rough stuff, some folks might want a more simplified click-mount system for ease of use.
You’d be hard-pressed to find a similar model with better performance and pricing than the Macro Drive 1300XXL. It impresses at every turn. Goodbye to those awful battery operated lights, check out this excellent bike light!
3. Garmin Varia RTL515 – Best Rear Bike Light
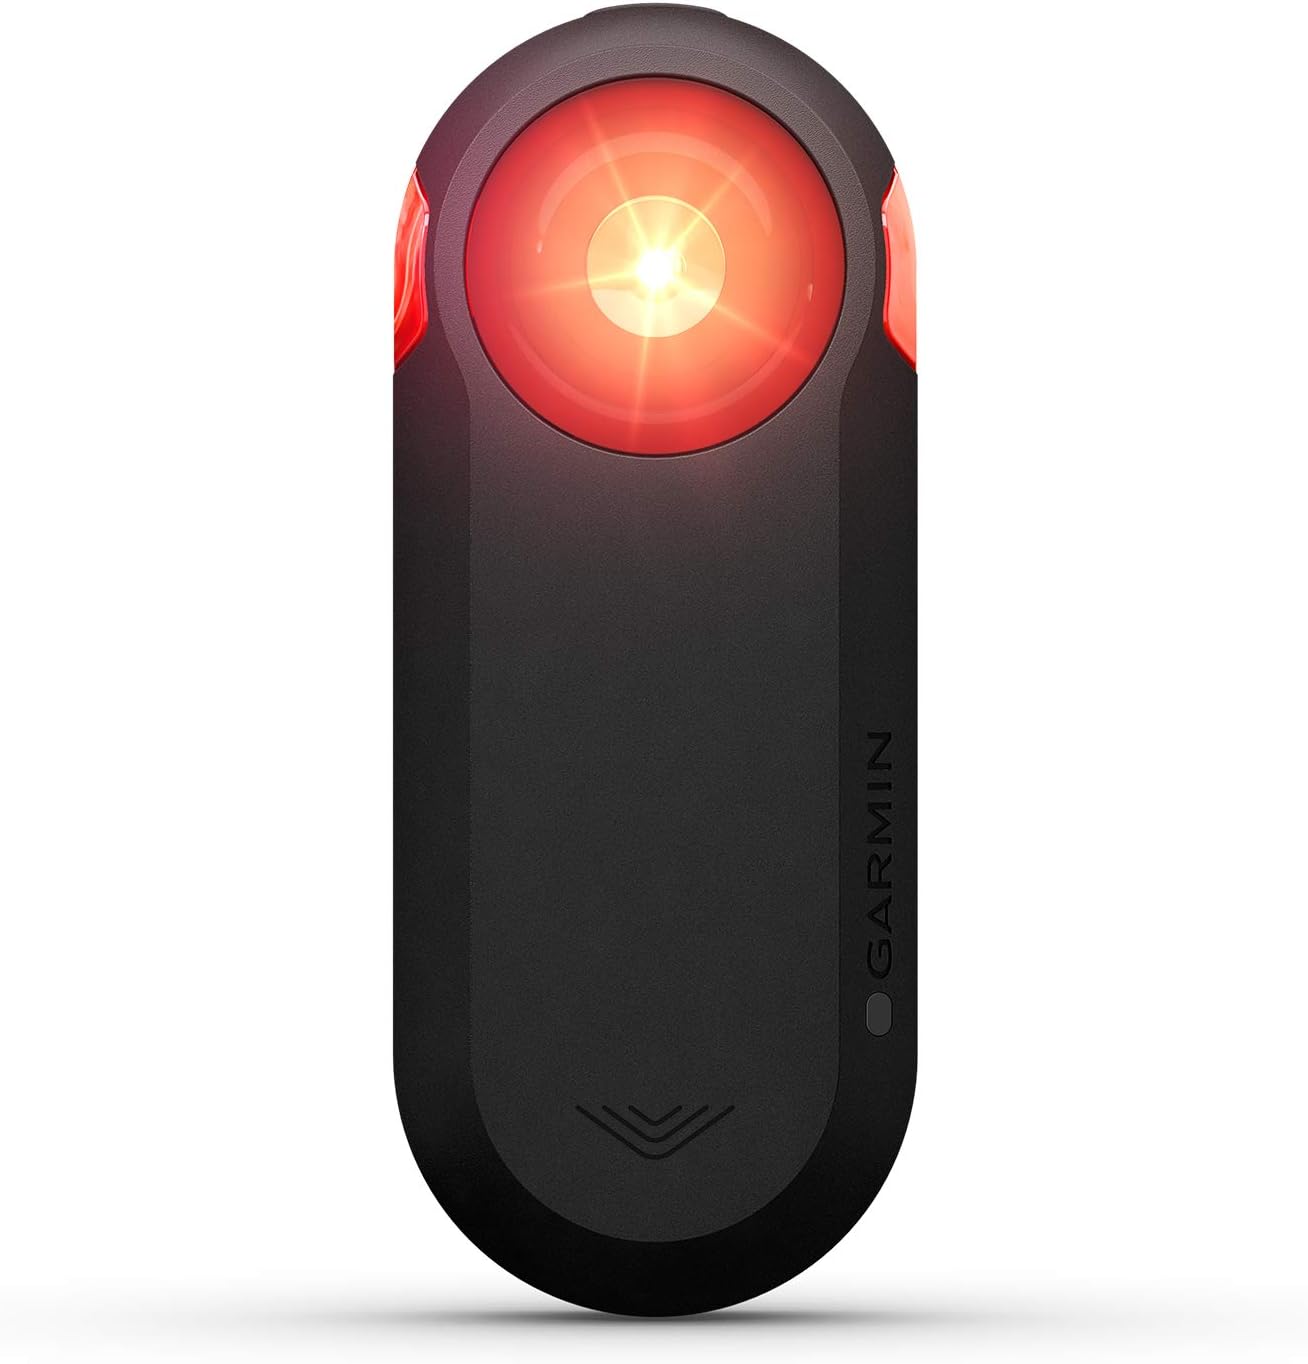
Garmin Varia RTL515—A top choice for cyclists looking to stay visible on their rides. The world-first rear light/cycling radar system greatly increases your awareness on the road.
Its clear advantage is detection of cars and bicycles approaching from behind 140 meters behind. This allows you crucial reaction time and helps you to stay safe, especially on busy roads. It also pairs neatly with Garmin computers, so you have a unified cycling system. If you don’t have a Garmin device, download the Varia app to your phone, but a dedicated computer will maximize your experience with your radar.
The built-in battery lasts for 6 hours on full brightness, and even longer if you stick with flash mode. During the day its visibility extends up to a mile to ensure that drivers see you. Installation is also of ease, with a slew of optional seatpost adapters to fit different bike types.
Sound alerts and color-coded visuals definitely help, but some users may prefer more detailed information. But with a good setup, you’ll appreciate the intuitive alerts.
What I really, really love is that the Varia provides a greater degree of confidence when you’re on the road and more aware of your surroundings. While paired performance is best with Garmin devices, this radar light still does pack a punch. If you’re serious about safe cycling, the Garmin Varia RTL515 is an exceptional pick.
4. NITERIDER LUMINA OLED 1200 BOOST – Best Bike Light for Best Battery Life

With the NITERIDER LUMINA OLED 1200 BOOST, you’ll never fear riding at night again. This bright bike light is great for commuting, mountain biking and gravel riding. At 1,200 lumens, it lights up everything ahead to make sure you know what’s coming.
The bright OLED screen is one standout feature. This unrolling shows battery life left and also five light levels with four daylight flash modes. With this information you’ll never have to guess how much power you have left while riding late in the day. The light automatically switches to low power when the battery is low. By doing this, these funny little bulbs give you up to two additional hours of visibility in less-than-ideal conditions, meaning you’ll be safe out there.
With multiple settings versatility reigns supreme. 276 lumens or the whole 1,200? Therefore, it can be changed depending on your needs and is applicable in different situations. After using it so extensively, it’s easy to see why the Lumina is widely regarded as the best in its class, especially when compared to less reliable models.
Though the auto down shift to low power may surprise you from time to time, in the end it prioritizes performance consistency. This considerate feature helps ease your insecurity while dealing with darker roads.
The best bike light for battery life is the NITERIDER LUMINA OLED 1200 BOOST, which we put through our rigorous testing. If you’re yet to find that light that makes a difference, step up your rides and check out this incredible piece of kit today!
5. NiteRider Lumina Micro 900 – Best Budget Bike Light

NiteRider Lumina Micro 900 — $60.00 ($89.99): Shine bright on a budget! This bike light is a great option for almost anybody who needs reliability but doesn’t want to spend a fortune. Its simple mounting suits different handle bar size so you can use it in another bike. Disengaging the light is similarly seamless, transforming it into a useful flashlight when the need arises.
It’s got a single button, a major highlight. This clever program serves as a power switch and a low-battery alert. A blue light indicates a full charge; a red light indicates you should recharge. This means no surprise blackout on your ride.
This model’s body is defined by durability. Designed for rocky trails, it absorbs vibration and impacts easily. The wide beam at full power increases safety, providing visibility in difficult conditions.
While not quite two hours at a time for 900 lumens, it still kicks ass. No matter, even an added twenty minutes of testing is a small compromise.
The ability to be well-balanced in both design and performance is what I enjoy most. If you like the way the NiteRider 1200 OLED Boost looks but want to save some dollars, this is your best option without losing that much. You’ll lack the information screen, but that sacrifice seems small next to the rugged build and dependable brightness. This mini-revelation is why we go deep on budget bike lights, and this .
Things To Consider When Buying a Bike Light:
Biking at night can be thrilling, but it also comes with its own safety challenges. When you decide to invest in a bike light, it’s important to consider several factors that will enhance your visibility and comfort. From brightness levels and battery life to mounting options and weather resistance, understanding these features will help you choose a light that meets your needs. This guide will equip you with the knowledge to make an informed decision and keep your rides both enjoyable and safe.
Types of Bike Lights
Your choice of bike light can greatly impact your night riding experience. When selecting a bike light, consider the different types available:
- LED lights
- USB rechargeable lights
- Blinking lights
- Strobe lights
- Integrated bike lights
Perceiving the benefits of each type will help you find the best option that suits your riding style and environment.
Front Lights
Even though you may notice various front lights, their main purpose is to illuminate your path ahead clearly. A well-designed front light will allow you to see obstacles, potholes, and any potential hazards, making your ride safer.
Rear Lights
Clearly, rear lights play an crucial role in your safety while biking. Positioned at the back of your bike, they ensure that drivers and other cyclists are aware of your presence, particularly in low-light conditions.
Types of rear lights vary widely in form and function, from single-LED options to more sophisticated models offering various flashing modes. Some even come equipped with sensors that adjust the brightness depending on ambient light levels, ensuring maximum visibility whenever you ride.
Combination Lights
Combination lights represent an efficient choice, as they offer both front and rear lighting in one unit. This dual functionality simplifies your setup while ensuring you remain visible from all angles.
To maximize your safety, consider investing in a quality combination light that meets both your visibility needs and riding style. These multifunctional tools eliminate the need for multiple lights while providing comprehensive coverage, allowing you to enjoy cycling with peace of mind.
Factors to Consider When Buying a Bike Light
There’s a lot to think about when selecting the right bike light. Consider these factors to ensure you make an informed decision:
- Brightness Levels
- Battery Life
- Mounting Options
- Durability
- Price
Perceiving the importance of each of these aspects will lead you to the perfect bike light for your needs.
Brightness Levels
Little do many riders know that brightness levels can vary significantly between bike lights. Aim for a light that offers adjustable settings, as this allows you to customize the brightness based on your riding conditions. Opting for at least 100 lumens is ideal for city rides, while off-road adventures may require even brighter options.
Battery Life
Some bike lights have impressive battery life while others will leave you in the dark sooner than expected. Typically, you should look for a light that provides at least 4-10 hours on a single charge, depending on brightness settings. Rechargeable lights often perform better in this regard, but regular batteries might be more convenient for quick replacements.
It’s also wise to consider how you plan to use your bike light. If you frequently ride for long distances or during extended night rides, focusing on a model with longer battery life is crucial. Models with energy-efficient settings can extend the runtime, while those with indicators let you know when it’s time to recharge, ensuring you are never left without light.
Mounting Options
Options for how you mount your bike light can make a significant difference in usability and safety. Different lights come with various mounting systems, such as handlebar, helmet, or seat post attachments. Choose a mounting style that complements your riding habits and allows for quick removal when necessary.
Another key aspect of mounting options is adjustability. Being able to angle your bike light in the proper direction can effectively illuminate your path without blinding oncoming traffic or other riders. Ensure that the mounting system operates smoothly and is compatible with your bike type for a hassle-free experience on every ride.
Tips for Choosing the Right Bike Light
Unlike just picking any light off the shelf, selecting the right bike light for your needs requires careful consideration. Keep these tips in mind:
- Brightness level (lumens).
- Battery life and recharge options.
- Light beam type (wide vs. focused).
- Mounting options and stability.
- Weather resistance.
Any of these factors can significantly impact your riding experience.
Terrain Considerations
Now, consider the types of terrain you’ll be cycling on. If you often ride on uneven or off-road paths, a more powerful, focused beam will help illuminate obstacles and enhance visibility. For urban environments, a light with a wider spread may be beneficial to see and be seen.
Usage Scenarios
Scenarios can change your lighting needs significantly. If you plan to ride mainly at night, you’ll want a high lumens output for better illumination. Alternatively, if your biking is during the day, consider lights with flashing modes to increase your visibility.
Usage of your bike light may vary depending on your specific cycling habits. If you frequently bike during dawn, dusk, or in low-light conditions, a bright, consistent beam can enhance your safety and comfort. If you commute in urban environments, lights with both constant and flashing modes can help ensure you are visible to drivers, reducing the risk of accidents.
Legal Requirements
Bike lights may also be subject to local regulations. Check your local laws regarding the required brightness and types of lights you must have while riding at night.
Choosing the right bike light in accordance with legal requirements not only ensures your safety but also keeps you compliant with the law. Regulations can vary greatly by location, and you might need to equip yourself with specific types of lights or reflective accessories, making it important to stay informed about your area’s rules.
Step-by-Step Guide to Installing Bike Lights
Now that you’ve chosen the perfect bike lights, it’s time to install them efficiently. Follow this straightforward guide to ensure your lights are securely attached for optimal visibility on the road.
Tools Needed
Now, you’ll want to gather a few basic tools to make your installation easier. A small screwdriver, some zip ties, or an adjustable wrench may be necessary based on your specific bike lights. These tools will help ensure a solid attachment and allow for any adjustments to be made effortlessly.
Installation Process
Some bike lights come with specific mounting instructions that you should follow closely. Generally, you may need to use rubber straps or brackets, so make sure to assess the best method to secure your lights based on their design.
For instance, if you have a light that mounts on the handlebars, find the appropriate spot by considering your comfort while riding. Loosely attach the light first, allowing some flexibility for positioning. After finding the best angle, secure it tightly. If your light uses rubber straps, ensuring they’re snug can prevent them from shifting. Following these steps will lead to a safer and more visible ride.
Pros and Cons of Different Bike Lights
Keep in mind the various advantages and disadvantages of bike lights when making a decision. Each type may offer specific benefits suited to your needs, but also comes with its own drawbacks. Evaluating these can help you make an informed choice.
| Type | Pros | Cons |
|---|---|---|
| LED Lights | Bright, energy-efficient | Higher initial cost |
| Incandescent Lights | Inexpensive | Less bright, consumes more energy |
| Rechargeable | Long-term savings | Charging time required |
| Disposable Batteries | Convenient replacement | Ongoing battery costs |
| Front Lights | Increased visibility | May be heavy on the handlebar |
| Rear Lights | Essential for safety | Limited brightness |
| Solar-powered | Eco-friendly | Dependent on sunlight |
| Multi-function Lights | Versatile features | Can be complex |
| Helmet Lights | Good visibility from all angles | Can be irritating for some |
| Wearable Lights | Flexible positioning | May not provide ample lumens |
LED Lights
Some of the best options available today are LED lights. They are known for their bright illumination and energy efficiency, making them a top choice for both commuter and recreational cyclists. With various brightness settings and battery life options, LED lights ensure you remain visible and safe while riding at any time of day.
Rechargeable vs. Disposable
An important consideration when selecting bike lights is whether to opt for rechargeable or disposable battery models. Each has its own benefits and downsides, which you should weigh based on your riding habits and preferences.
To further clarify, rechargeable lights save you money in the long run as you won’t need to constantly replace batteries, which can add up over time. However, they do require a charging period, which may not always be convenient. On the other hand, disposable battery lights are easy to replace but can become costly with frequent use. Ultimately, your choice will depend on your cycling frequency and willingness to manage the recharging process.
Maintenance and Care for Bike Lights
After purchasing your bike light, regular maintenance is key to ensuring its longevity and optimal performance. Taking the time to care for your lights will not only improve visibility but also enhance your safety during rides. Make it a part of your routine to inspect and maintain your bike lights periodically, especially before longer trips or nighttime rides.
Cleaning
Cleaning your bike light is simple yet important. Use a soft cloth and gentle soap to wipe down the exterior, removing dirt and grime that can affect brightness. Avoid using harsh chemicals that may damage the lens or housing. Regular cleaning helps maintain the clarity of the light, ensuring maximum visibility when you need it most.
Battery Replacement
For your bike light to operate effectively, regular battery replacement is necessary. Depending on usage, you should check your lights every few months to see if the batteries need refreshing. Some lights come with rechargeable batteries, while others require standard batteries. Knowing your system will help you stay prepared.
Care for the battery by following manufacturer guidelines regarding replacement intervals and charging practices. If your light uses rechargeable batteries, keep them charged and avoid letting them deplete completely, as this may affect their lifespan. For non-rechargeable lights, always have a spare set on hand to ensure you are never left in the dark.
To wrap up
Conclusively, when buying a bike light, you should consider factors like brightness, battery life, mounting options, and visibility range. Evaluate whether you need a front light, rear light, or both for your specific riding conditions. Additionally, look for features such as waterproofing and user-friendly controls to enhance your biking experience. Ultimately, investing time in research will ensure you select the ideal bike light that meets your safety and riding preferences.